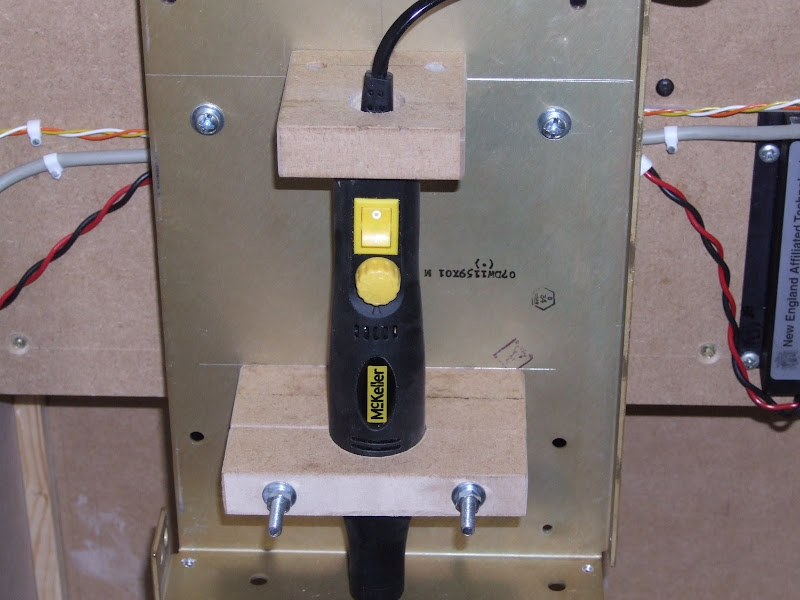
I made some mounts out of MDF and these were bolted onto a 2 mm aluminium plate which had some folds in it for strengthening. I could not find a source of countersunk bolts long enough to go through the top mount. Instead I used some shorter ones and made captive nuts out of PolyMorph. I did this by first drilling clearance holes from the back of the mount to a depth just longer than the bolts. I then drilled 5 mm holes through the thickness of the MDF to meet them. I filled these with molten PolyMorph. When it had set I drilled it for tapping but I found I could just screw the bolts in and they cut their own thread. This technique seems to make a successful fastener system.
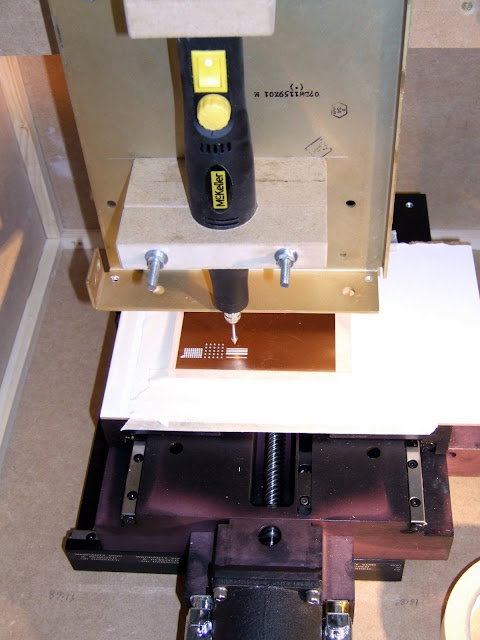
I asked a friend who works for a company that owns a professional PCB mill what they place under the PCB while it is being drilled. He was kind enough to send me a sample. It is 2 mm hardboard laminated with a thin layer of hard, melamine like, substance on each side. I have not found a source for this yet but my wife, ever keen to see "junk" turned into something useful, suggested I used some laminate flooring offcuts we have in the garage. I will give this a try, but for my initial test I used the hardboard sample. I just taped it to the top of my XY table with masking tape and taped a piece of PCB material on top. The arrangement is shown below :-
And here is a magnified view of the results :-
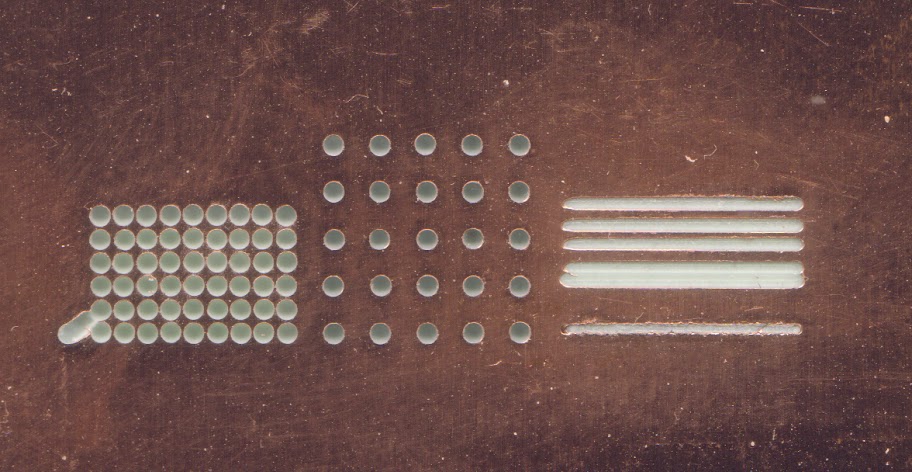
The diagonal on the far left is where I broke a drill due to a typo in the code: step_x instead of step_z. The drill made a valiant attempt at being a milling bit before it snapped. Not a good start, this could get expensive!
The holes on the left are 1 mm on a 50 thou grid. So far I have tried to keep all the units in this blog metric but PCB measurements are traditionally done in 1000 ths of an inch because most component leads are on a 0.1" grid. Again this was a bug but it turned out to be a good test to show drill run out. The gaps between the holes should be 0.27 mm or about 10 thou.
The holes in the middle are on a 0.1" grid which was my original intention. The holes don't actually go all the way through due to end play in the drill.
The bottom slot on the right was done with the conical tool shown in the picture below :-
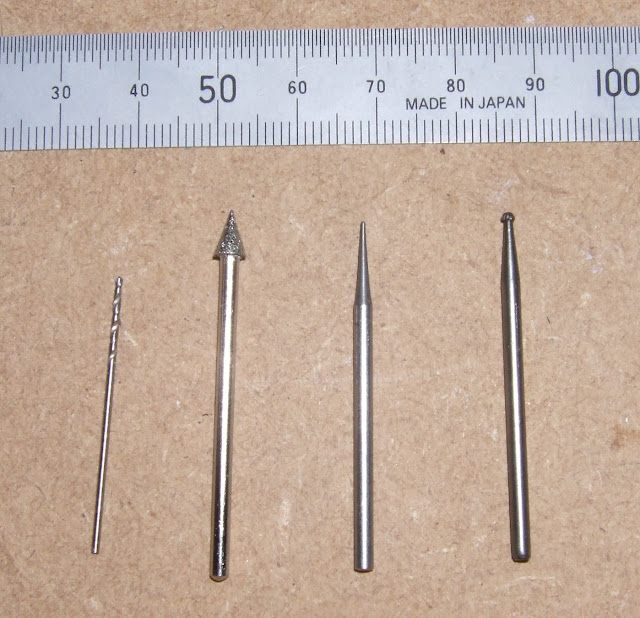
This has quite a fine tip but an abrasive surface rather than cutting flutes. I estimate the channel is about 20 thou but the edges are a bit ragged, particularly the top edge. The tool rotation was clockwise and the travel left to right. This means the bottom edge was climb or down milled and the top edge conventional or up milled. Climb milling is recommended for a better finish so I need to organise my tool paths to go clockwise around the outside of tracks.
The three tracks were produced with a rose burr tool like the one on the far right but smaller. The remains of it are shown in the middle. I snapped it after the test with another accident. This tool created a smoother cut. Again, the bottom edge is cleaner. The bottom track is about 20 thou, the middle one 10 thou and the top one 15 thou. The gap between tracks is about 30 thou.
My target for through hole PCBs is 10 thou tracks and 15 thou gaps. This allows one to get a track between two 60 thou pads 0.1" apart, i.e. between the legs of a chip.
Things I learned from this experiment :-
- Not surprisingly, the cheap (£20) drill was not up to the job. It has about 1 mm end play and noticeable lateral play. It is also very noisy when mounted on the machine. I have ordered a 30000 RPM 600W laminate trimmer for £26.49. Again, I will not know the quality of the bearings until it arrives, could be another mistake.
If that does not work I might try a Dremel or perhaps one of these :-
This is an 800W router spindle motor for about £80.
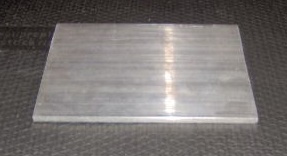
There is a good article on how to make your own PCB router spindle here but I think my lathe is too small. - The 2mm aluminium plate is not stiff enough, I got a 6mm slab from eBay to replace it.
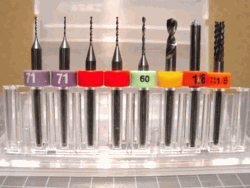
- The milling bit, before I broke it, was too big. I got an eight piece "carbide circuit board maker" kit from Drill Bit City for $23. They were very helpful and efficient. Again the good stuff is on the wrong side of the pond so the shipping was another $12.
They also sell carbide end mills down to 5 thou. These are quite pricey and delicate but I might try some when the software is stable. I will need smaller clearances for fine pitch surface mount. - I need dust extraction and it needs to be a fairly strong suction to lift the copper chips. I can buy a 1300W vacuum cleaner from ASDA for about £17.


Try looking at J&L Industrial, in Wolverhampton. They sell tonnes of stuff like these milling bits.
ReplyDeleteIt's mscjlindustrial.co.uk and they sell nearly everything, from threaded rod and the nice steel rods used, through milling bits, right up to full sized CNC milling systems.
Get a paper catalogue though, because the website is rubbish!