Thursday 9 June 2011

Reliable connections

After eliminating lots of other sources of unreliability in my machines, electrical connection failures are now the most common failure mode.

The latest failure on my Mendel was that it started leaving a 10mm gap in the outline rectangle that it draws around the objects. Since a bed full of objects still seemed to build OK I decided perhaps it was due to an air bubble in the extruder while it was warming up. However, one time I saw the extruder motor stall and realised it was actually a bad connection.

I have come to realise that simple friction fit connectors do not work in the environment of these machines. I tried re-seating the motor plug but that did not fix it, so I figured the cable must be faulty. I wired both coils in series to my multimeter and waggled the cable until it went open circuit. That allowed me to locate the break and it was, as could be expected, at the point where the cable bends the most, i.e. just below the cable clamp on the  top right of this picture: -


On reflection this was not a good arrangement as the cable is only just long enough for the extremes of travel, so it is forced to bend sharply both ways at the clamp. After millions of movements the strands break one by one but the insulation holds the ends together making it only lose contact when it is stretched. When I pulled the ends of the wires three of them snapped very easily, indicating most if not all the strands were broken.

I had a similar problem with the mains wire to a heated bed a while ago. In that case the arcing melted the insulation and allowed the live and neutral to short out, blowing a hole in outer sheath of the cable. Not good! Normally you expect a fuse to protect against a cable fire, but if all the strands start breaking, reducing the current capability, or it breaks and arcs, the fuse offers no protection against fire. Even a low voltage heated bed could fail in this way because of the high current.

The XY table of HydraRaptor uses 9 way D-type connectors. These have been totally reliable moving connections because they are screwed together and have gold plated pins and proper strain relief. The professional stepper motor drives on HydraRaptor have screw terminal blocks for their connections, and again they have proved totally reliable. In contrast all the friction fit connectors fail if there is any movement or vibration of the wire. Some even burn out despite being run at well below their current rating. The contact resistance rises and they then start to heat up.

I rewired my Mendel extruder using a 9 way D-type at the extruder and a longer loop of cable. That necessitated resiting the extruder controller and I also replaced all of its 0.1" MTA connectors with screw terminal blocks. The wires could go straight into these but I added ferrules to allow them to be more easily removed and replaced. I just push the wire into the ferrule and then squeeze it with pliers.

I reprapped a bracket to attach the DB9 connector to the back of  Wade's extruder bracket.

The pins are four motor connections, two heater, two thermistor and one heatsink fan that shares a 12V feed with the heater.

Here is the new arrangement :-


The cable loop is much longer, so it bends through a much smaller angle. The top end goes through two cable clamps before it goes to the extruder controller. I found that if you put a bunch of wires though a single clamp you can get some movement at the other side of the clamp. Using two eliminates any movement of the wire relative to the board, less critical now I that have screw terminals, but still a good idea.

It should last a lot longer than the previous cable (which lasted for 15 months of continuous use) and can be easily replaced. I have seen people use corrugated tubing to protect the cable, but I didn't fancy adding any more drag on the extruder as it would increase backlash.

Interestingly, although my extruder stepper motor connections have failed several times, I have never damaged the Allegro driver chips.


Monday 25 April 2011

Auto bed leveling

One thing I find tedious is leveling the bed of my machines, so I decided to make use of the Z-probe on HydraRaptor to measure the incline of the bed and compensate for it in software.

First I had to increase the resolution of my Z axis. When I first built the machine I did not realise that I would need fine resolution on Z, so I used an old 24V unipolar motor that I had in my junk collection. With half stepping it gave me 0.05mm resolution. I thought that it was a 200 step motor and that the lead screw had a pitch of 20mm. It turns out it must have been a 250 step motor because the pitch is actually 25mm. I replaced it with a Keling KL23H251-24-8B NEMA23 left over from my Darwin and I now drive it with a x10 microstepping controller the same as I use on X and Y. That gives me a resolution of 0.0125mm and also makes it the fastest axis on my machine. It can easily do 150 mm/s but seeing the nozzle approaching the bed at that speed and then stopping within 0.3mm is very unnerving, so I limit the speed to 50mm/s!

I no longer need the heat sink and fan because the new motor is more efficient and is directly mounted on the axis, which takes the heat away.


I use 6mm aluminium tooling plate so I make the assumption that the bed is a flat plane (rotated slightly around the X and Y axes and offset a little in Z). That means I only need to measure the height at three arbitrary points in order to characterise that plane. I then use the method here to calculate the equation of the plane in the form ax + by +cz +d = 0. The method puts two vectors through the three points and takes the cross product to get a vector at right angles to both of them. That is the normal to the plane and its components are the coefficients a, b and c. Substituting the first point into the equation gives d.

It is important that the three points are ordered anti-clockwise, otherwise the normal vector would point downwards and the machine would try to build the object upside down under the surface of the bed!

Given the bed's plane I then have to make the model coordinates relative to that inclined plane and transform them to the coordinate system of the machine. To do that I calculate two orthonormal basis vectors on the plane using it's equation and use the normalised normal vector for the third. I then multiply the model coordinates by those vectors and add the origin to find where they are in the machine's coordinates. Here is the Python code I used: -

class Plane:
    "A plane in 3D."

    def __init__(self, p0, p1, p2):
        "Construct from three anti-clockwise points"
        #
        # Calcluate the normal vector
        #
        v1 = p1.minus(p0)
        v2 = p2.minus(p0)
        normal = v1.cross(v2)
        if normal.z < 0:
            raise Exception, "Probe points must be anti-clockwise"
        #
        # Coefficients of the plane equation ax + by + cz + d = 0
        #
        a = normal.x
        b = normal.y
        c = normal.z
        d = -a * p0.x -b * p0.y -c * p0.z
        #
        # Generate three basis vectors aligned with the plane
        #
        self.origin = vector( 0, 0, -d / c)

        self.k = normal                      # k axis is simply the normalised normal
        self.k.normalize()

        px = vector( 1.0, 0.0, -(a + d) / c) # an arbitrary point on the x axis: x = 1, y = 0
        self.i = px.minus(self.origin)       # find direction to it from origin
        self.i.normalize()                   # make a unit vector

        self.j = self.k.cross(self.i)        # make a third vector mutually at right angles to the other two
        self.j.normalize()                   # make a unit vector, probably is already

    def transform(self, p):
        "Transform a point to be relative to the plane"
        return self.origin.plus(self.i.times(p.x)).plus(self.j.times(p.y)).plus(self.k.times(p.z))

To test the principal I put a 1mm thick washer under one corner support of the bed to give it an extreme slant compared to normal misalignment. I then built a 100 x 100 x 5mm cube with 0.35mm layers. This would normally be impossible without the bed being level to a small proportion of the layer height. The result was that it came out fine.


As the nozzle traverses the object in XY the Z axis moves a few microsteps. It is barely visible but I can hear it and feel it if I hold the stepper motor shaft. The object is built perpendicular to the plane of the bed, so the sides are very slightly slanted with respect to the machine axis and the nozzle. I am not sure how well it would work on Mendel as the z-axis is geared down so much. It would probably still work as the movement required is so small when the bed is reasonably level. I can't test it as there isn't room for a z-probe on my carriage due to the large heat sink.

Monday 4 April 2011

Auto z-probe

A niggling problem I have with Hydraraptor is that the z-axis calibration varies with the weather and how much it is used. This is because the frame is made from wood, which absorbs atmospheric moisture and expands. When the machine is running constantly the heat from the bed dries it out and it plateaus at a low z-value. If I don't use it for a while the z-axis gets higher by as much as 0.5mm in wet weather and the first few builds need large adjustments. When printing raft-less the initial layer height needs to be accurate to about 0.05mm for 0.3mm layers.

When it was configured as a milling machine I made a tool height sensor to solve the problem. It doesn't work for FFF though because the nozzle usually has hot plastic dribbling from it and it also wastes some of the build area.

To solve the problem I designed a z-probe that hangs below the nozzle at the start of the build but then retracts itself after the measurement. It consists of a weighted metal rod that slides through a couple of plastic guides. It has a plastic flange on the top that depresses the plunger of a light action micro switch. In measurement mode the rod protrudes about 10mm below the nozzle. When the measurement is completed the axis descends to place the nozzle close to the bed. The rod lifts until the attractive force of two Neodymium magnets causes it to be pulled about 5mm above the nozzle and held there until the start of the next build.


Here it is installed on the axis.


I used a Meccano worm gear as an improvised weight to ensure the micro switch is activated, much cheaper options exist! The actual weight is surprisingly not very critical. It must be enough to activate the switch reliably but not too heavy for the magnets to lift.


The operating procedure is as follows: The machine warms up the bed and the extruder and waits for a couple of minutes for the nylon pillars that support the bed to expand fully. It then extrudes a length of filament with the z-axis at the top and gives an audio prompt on my computer. I grab the filament and snap it off and then lower the z-probe, which closes the switch and instructs the machine to start.

The axis descends rapidly to place the rod 1mm above the centre of the bed. It then descends in 0.1mm steps until the switch opens. Then it ascends in 0.01mm steps until the switch closes again and that gives the Z calibration point, which is a known distance (about 10mm) above the bed. The nozzle then descends to 1mm above the bed to retract the probe before it moves to the start point.

Here is a video of the sequence.


It could also lower the probe automatically simply by having a bracket near the top of the z-axis to catch the flange as the axis rises past it. The reason I don't do that at the moment is because I use the act of manually lowering the probe as a cue to the machine that I have removed the start extrusion.

The design is on Thingiverse.

Sunday 13 March 2011

Spot on flow rate

I have been doing some fine tuning of flow rate recently. I had previously noticed that PLA appears to need a slightly lower flow flow rate than ABS. I didn't notice this with HydraRaptor but I did when I changed from PLA to ABS on my Mendel, which has a Wade's extruder. My theory was that PLA feeds faster than ABS for the same rotational speed of the pinch wheel because, being much harder, it sits on the crests of the teeth and hence is driven by a larger effective pinch wheel diameter than ABS, which sinks in further. This effect is more extreme with a smaller pinch wheel. HydraRaptor has a 13mm pinch wheel compared to just 5mm for the hobbed bolt in my Wade's.

Other people have claimed that ABS changes density when it is extruded. I didn't believe that so I did an experiment to investigate.

I programmed HydraRaptor to extrude 100mm of ABS. I put a mark on the feedstock about 120mm away from the top of the extruder and measured how far the mark moved. I also measured the length and diameter of the extruded filament and I also weighed it and a 100mm sample of the feedstock. These are the results: -
Filament input to the extruder: 105mm of 2.98mm ABS equals 732mm3, weighs 0.777g, density 1.06 g/cm3.
Filament extruded: 2.89m at 0.56mm diameter equals 712mm3, weighed 0.764g, density 1.07 g/cm3.
So on the face of it the volume has gone down by 3% and the weight by 2% giving a slight increase in density. This could be explained by some volatile compounds boiling off, which they do, but I think it is mainly measurement error. In particular the diameter measurements have a big effect because of the square law for area. I took four measurements and averaged them but that is not many along 3m of extruded filament. Also the electronic scale I used to weigh the filament does not have a very stable display as it is only a cheap instrument. It is certainly a lot less than the 15% I have seen reported though.

I also extruded "100mm" of PLA and that actually fed 110mm, showing that with a 13mm pinch wheel it feeds about 5% faster. With a 5mm hobbed bolt I would expect that to be about 12%, which starts to become very noticeable.

So I corrected the pinch wheel diameter in my software for the correct value for ABS and added a bodge factor for PLA. That left the flow rate a bit too low as it has previously been producing good looking objects with the overfeed, so I reviewed the maths I was using.

I have always extruded filament with a 1.5:1 width over height ratio and use a flow rate that would fill a circle 1.25 times the layer height. That was because I originally observed that you need to squash the filament to 0.8 times its diameter to get a good bond and that makes the width about 1.5 times the height. However, that only gives a packing density of 82%, which is a bit low. If you increase the flow rate so the infill is 100% then the outlines will be too wide. This is because the infill can occupy the full rectangular cross section of the filament road, but the outline, being unconstrained, will not have straight sides, so will be wider.

I reasoned that the outline will be extruded with a flat top and bottom where it is constrained between the nozzle and the bed but the sides will most likely be semicircular due to surface tension effects. This led me to a formula that gives the width from the notional extrudate diameter and the layer height.


Equating the two areas gives πd⁄ 4 = πh⁄ 4 + h (w - h). So w = h + π(d⁄ h - h) ⁄ 4 allowing the width to be predicted from the layer height and the flow rate.

Calling the aspect ratio a = w ⁄ h and re-arranging to get the flow rate to make the desired width gives: d = h√(1+ 4(a - 1) ⁄ π). For an aspect ratio of 1.5 d = 1.28h. I had previously been using 1.25h which is about 5% too low but was compensated for by the pinch wheel overfeed. I made a single walled box with the corrected pinch wheel diameter and the new formula and verified that the walls were 1.5 times the layer height.

I also used the same flow rate for the infill, but that can be increased up to the full area of the rectangle w×h. Because the outline and infill use different flow rates there is a small deficit of plastic where they meet, as this model shows: -


This can be fixed by using the infill perimeter overlap ratio setting in Skienforge, but how much? The deficit in area is a rectangle h  ⁄ 2 × h minus a semicircle of diameter h, i.e. h⁄ 2- πh⁄ 8. If the infill overlaps by a distance x then it contributes an area x × h. Equating these gives x = h (0.5 -π/8).

Converting to a ratio of w gives x/w = (0.5 -π / 8) / a. For a = 1.5 that gives an overlap of 0.07 leading to a "fully stuffed" model where the solid layers are 100% plastic.


In practice that leaves no room for error and requires the nozzle to force the plastic into the corners of the rectangular channels like an injection molding machine. I found I get a better looking object with the volume reduced to 90% of that value. So for the infill I use the formula d = h√(0.9 × 4a  ⁄ π) giving d = 1.31h for a = 1.5, making the optimum flow rate for the infill about 5% more than the outline. I also use an overlap value of 0.05 giving the theoretical packing arrangement below.


Running the new equations on my Mendel certainly produces nice looking objects:


At least four people I have sold parts to have commented they look as good or better than parts they have seen from a commercial machine. I use filament about twice the diameter that commercial machines use, which results in more visible layers and rounded corners, etc, but apart from that I must be close now.

Saturday 5 February 2011

Polyholes

When Reprap machines print holes they tend to come out undersized, even if the linear dimensions of an object are spot on. There are several effects that all make holes smaller than they should be: -

Faceting error
When CAD systems convert cylinders to triangles they produce a polygonal prism, so holes represented in an STL file are polygons with their vertices on the circumference of the original circle. That means the sides of the polygon are inside the circle, shrinking it by cos(π / n).
You need 10 vertices to reduce the error to 5% and 22 for 1%. So this error quickly becomes small as n increases but that creates another error:-

Segment pausing
When a circle is broken into a lot of little segments the start up time for a segment becomes significant. Reprap in the past has suffered from this really badly and I am unsure what the current status is. Slow serial comms and complex floating point firmware add pauses where extra filament can ooze from the nozzle.

I have never suffered from pausing because I use a 100Mbit Ethernet connection, which has a very low latency, and the data is transmitted in binary and in the units my firmware works in. This means that no further processing is required other than calculating which of the three axes has to go the furthest. However, I use trapezoidal acceleration on each segment, so for very short segments the average speed will be a little lower.

Arc shrinkage
When a flat strip of filament is bent into an arc there is too much plastic on the inside of the curve and too little on the outside. That makes both the inside and outside edges a smaller diameter than they should be. Adrian calculated a formula for it here: http://reprap.org/wiki/ArcCompensation. The formula comes out with a figure that is too small though. I think there is a secondary effect:

Corner cutting
When filament is dragged round a corner it likes to take a short-cut. This depends on how elastic the filament is and how much it is being stretched. I think when the nozzle moves in a circle the filament is continually trying to cut the corner and ends up forming a smaller diameter circle. I think this is the dominant effect on my machines.

Obviously, if you lie to Skeinforge about how wide your filament is that will make holes even smaller, but that is just a calibration problem.

Ideally all these effects should be compensated for in the slicing software but what has happened instead recently is that people are using parametric values in OpenScad to tweak the holes to come out right on their machines. That is the wrong approach because when the holes comes out smaller than they should be, without the slicing software compensating for it, then the infill doesn't meet it as tightly as it should do.

When I started printing Prusa Mendel parts I found the values in the configuration file far too big. I have also noticed this when downloading some designs from Thingiverse. That implies that my holes shrink less than a lot of other peoples, which is odd because all the effects above don't depend on the machine, apart from segment  pausing.

Some of the holes in Josef's parts are octagonal. That made me realise that polygons with low vertex counts don't shrink. The inside of the hole is defined by straight lines and they get extruded in the correct place. What does happen though is that the corners of the polygon are rounded. As long as the polygon has a small number of vertices, the corners are far enough from the circle that they can be rounded without impinging on it. The ideal number of vertices is when the corner cutting just meets the circle.

I decided to investigate this using OpenScad. I made a script that generates holes from 1 to 10mm with vertex counts from 3 to 8, 10, 16 and 32. The diameter of the holes is increased to make the polygon edges tangential to the circular hole. I.e. removing the faceting error by dividing by cos(π / n).

difference() {
    cube(size = [95,125,3]);
    for(i = [1:9]) {
        assign(v=[3,4,5,6,7,8,10,16,32][i - 1]) {
     assign(shrink =  cos (180 / v)) {
                echo(v,shrink);
                for(d = [1:9]) {
                    translate([d * d + 5 - ((v == 3) ? 3 : 0), 13 * i, 0]) 
                         cylinder(h= 20, r = (d/2)/shrink, $fn= v);
                }
            }
        }
    }
}


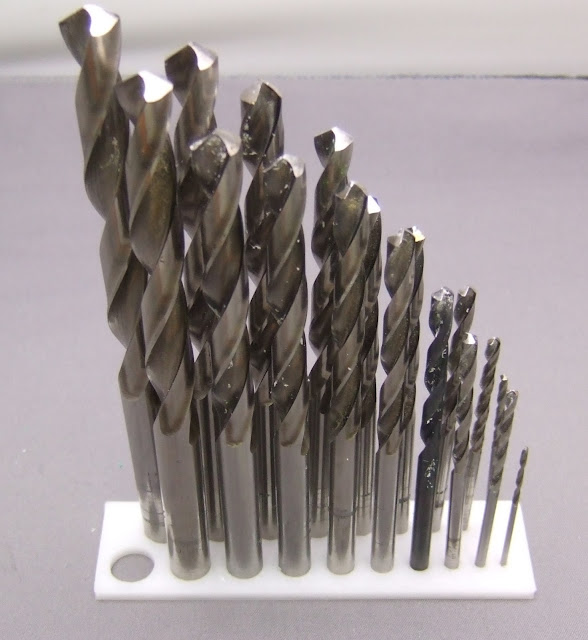
I printed the resulting shape on HydraRaptor and used drill shanks to gauge the hole sizes. Not terribly accurate as the shanks tend to be a little smaller than the tip. I inserted the drills in the highest vertex count hole that it would fit in.


A pattern emerged that the seemed to indicate the maximum number of vertices you can have before the hole shrinks is twice the hole size in mm. The only drill I couldn't fit was the 1mm drill because you can't have a polygon with only two sides. The "1mm" triangular hole did at least leave a hole though, whereas higher polygon counts fill in completely.

To test this simple rule I made a new shape with holes from 1mm to 10.5mm in 0.5mm steps with the number of vertices set to twice the diameter and the diameter increased by cos(π / n).

module polyhole(h, d) {
    n = max(round(2 * d),3);
    rotate([0,0,180])
        cylinder(h = h, r = (d / 2) / cos (180 / n), $fn = n);
}


difference() {
 cube(size = [100,27,3]);
    union() {
     for(i = [1:10]) {
            translate([(i * i + i)/2 + 3 * i , 8,-1])
                polyhole(h = 5, d = i);
                
            assign(d = i + 0.5)
                translate([(d * d + d)/2 + 3 * d, 19,-1])
                    polyhole(h = 5, d = d);
     }
    }
}


I found that all my drills bigger than 1mm fit. The large ones are a snug fit and the smaller ones a little loose, probably because with only a few tangential points touching there is little friction.


These two tests where done on HydraRaptor extruding 0.375mm filament from a 0.4mm nozzle. I printed this the test again on my Mendel with 0.6mm filament through a 0.5mm nozzle and the drills still fit, so it seems universal, at least amongst my machines. It would be interesting to see if others get the same result, so I have put the files on Thingiverse.

My goal is to work out how to print circular holes the correct size, but this seems like a good hack for OpenScad designs to allow holes to come out the right size, regardless of the printer or whether it compensates hole diameters. For example, one would expect circular holes to come out right on a professional printer, so if you have oversized circular holes in your model they will come out too big. However, if you use these low vertex count polygonal holes they should still come out the right size as one would also expect a professional printer to print polygons at least as accurately.

Monday 10 January 2011

ABS on PETG

I have been using PET tape on my heated bed for a long time now. It works very well as long as I clean it with acetone about every 100 hours. It does need a high temperature (145°C) for the first layer with some types of ABS though .

It seems to last forever, the only failure mode is that large thick objects with sharp corners can defeat the adhesive and raise blisters at the corners near the edge of the bed. I solve that by building little heat shields to keep the corners warm. I am always on the lookout for something better though. It would be nice to get rid of the lines where the tape butts against itself.

A friend gave me a sheet of 1mm thick PETG to try. I clipped it onto my heated bed, and thinking it would behave like PET tape, I ran a build using the same temperatures.


Big mistake, PET has a glass transition at 75°C so it went soft and floppy. The object stuck to it very well and was hard to remove, but after getting a knife under one corner, it peeled cleanly. However it left an impression in the PETG.


The base of the object is flat but the filaments are more ridged because they sank into the sheet rather than being squashed.


When the sheet cooled down it warped badly, so that was the end of that experiment. I did have a small offcut though so I tried again at 70°C.


This time the object warped badly. It stayed stuck to the PETG but it warped the sheet. The adhesion was less and the object was easily peel-able. The PETG warped where the object was but the rest of it stayed flat. The heat of the object must have been enough to tip it over its glass transition locally. It left an impression, but not as deep as the first time.


The filaments on the bottom were squashed tighter, not as smooth as when using tape.


So a failed experiment. It is a shame because at high temperatures it bonds very well but, unlike PC, it still peels, but it is no good if it doesn't remain rigid. Wikipedia does say that PETG has a lower melting point than PET. It doesn't mention how it affects Tg, but it gives the Tg of PET as 75°C. Odd then that PET tape doesn't go soft at 75°C. My next trial will be Mylar, which is another form of PET (BoPET).

Friday 31 December 2010

Frequency limit

I currently do my infill on Mendel at 36mm/s. The machine can go faster but the extruder flow rate maxes out at about 40mm/s when extruding ABS at 0.6mm, so 36 is a good safety margin for reliability and quality.

Although the speed is limited there is no real limit on how fast it can change direction. Suppose you make something 2.4mm wide with 0.5mm filament. E.g. a Mendel spring: -


Each wall will be 0.6mm wide leaving a 1.2mm gap in the middle. That gets filled with a zigzag infill where the head moves to within 0.3mm of each wall, so the head moves about 0.6mm on each stroke. At 36mm/s that makes 30 complete oscillations every second. 30Hz is a pretty high frequency for a mechanical system!

What actually happens is my y-axis starts to resonate. Over a few cycles the amplitude of the oscillation builds up and the infill overshoots the outline leaving a serrated edge.


The torque of a stepper motor is zero at rest and increases as it is displaced, so in that respect it behaves like a spring. That springiness together with the inertia of the rotor gives a resonance at hundreds of Hertz, known as mid band resonance. When the load is rigidly coupled, as in this case, the mass of the load brings the resonant frequency down.

As I don't get any missed steps I think the springiness might actually be in the belt rather than the motor. Timing belts have metal cables in them so that they don't stretch, but that makes them stiff, so they don't like to bend round a tight radius. That means the belt has some springiness being pulled round the pulley. A bigger pulley would be better but that would reduce the effective stiffness of the motor, so might actually make things worse. A lighter bed would be good but I haven't found a way to ensure it is flat without going to 6mm tooling plate.

I fixed the problem in software by slowing down the infill that has a high frequency content. I examine each infill path, one axis at a time, and convert it into a list of lengths between changes in direction. I then find the shortest wavelength over three cycles (less than three cycles is not long enough for the resonance to build up). I do this for X and Y directions and save the shortest of the two wavelengths. When I extrude the path I work out the frequency from the pre-calculated wavelength and the desired speed. I then compare that with a limit for each machine and reduce the speed if the frequency limit would be exceeded. I could have a separate frequency limit for each axis but I don't like the idea that the orientation of an object affects how it builds, so I pick the worst axis when deciding the limit.

I set the frequency limit to 20 Hz on my Mendel and 16 Hz on HydraRaptor. HydraRaptor does not show the overshoot problem, but it makes horrible growling noises and shakes the house. The machines make more interesting noises now because each infill run that hits the limit is extruded at an arbitrary lower speed. The overshoot is completely cured.


The builds are a bit slower and in some cases a long infill path will be slowed down by a short section that is high frequency, often a section between a hole and the outline. A more complicated solution would be to isolate the high frequency section and extrude the rest of the path at full speed.

Wednesday 29 December 2010

Tip top top layer tip

When I first started printing on my Mendel I found it difficult to get the top layer infill solid and meeting the edges. It behaved differently to HydraRaptor, but since it was a different bot and extruder and I had also changed to a different type of ABS and updated Skeinforge it was hard to work out what the problem was.

The first problem I identified was backlash caused by the filament dragging on the carriage. I fixed that by switching from basket feed to spool feed, see hydraraptor.blogspot.com/2010/07/bit-of-drag.html. That made a big improvement but I also set the "Infill Perimeter Overlap" ratio to its default value of 0.15, where previously I had used 0, and also increased the amount of plastic above the theoretical 100% value.

That is the way it stayed until very recently when I made a discovery about Skeinforge. A new parameter had appeared when I updated: "Infill Interior Density over Exterior Density" ratio, which defaults to 0.9. This seems like a good idea to make inner solid layers a bit less dense. It helps if the bottom layer is a bit too low by giving somewhere for the excess plastic to go. As I was using a little excess plastic anyway it seemed a good idea.

I had noticed that some outer surfaces are never well filled even when other surfaces on the same object are. Here is an example in the bottom of the well in this bracket.


I only realised recently that this was because the 0.9 is applied to some exposed surfaces, not just to internal ones. I set the value to 1.00 and things got a lot better. Not only does it fix the problem above, but it helps to make the other top surfaces solid. I normally use three solid layers to get a good surface on top of sparse infill. But with the first two at only 90% the top layer is still lacking in plastic. That is why I had to use a higher flow rate than theory predicted. Once I got rid of this parameter I could reduce the flow rate and still get a solid top surface. In fact, I can get a reasonable top surface with only two solid layers now.

Another side effect of having the flow rate too high to compensate for the layers below being only 90% was that the top layer was being forced in. When the infill goes from two different directions and meets in the middle I was getting a ridge because the plastic would be being forced into a channel that was a bit too small for it.

Yet another issue I had noticed was that some side walls were inexplicably lumpy. I.e. not in positions where the filament starts or stops. Examining the slices I realised that it was caused by the infill displacing the outline. This was because I had a 15% overlap. Since I made the inner solid layers solid I found I don't need this any more and those bumps have gone away.

So in summary I was using excess flow rate and infill overlap to compensate for inner solid layers (and some outer ones) not being 100% solid. The side effects were lumpy walls and ridges on the top surface.

Tuesday 28 December 2010

Round robin

I have been making a few small tweaks to my host software to improve quality recently. One such tweak is the order in which islands of an object (or objects) are visited. By "island" I mean a closed outline and the holes and infill that it encloses. Skeinforge seems to always go for the nearest island, so when it finishes a layer it starts the next layer on the island it has just done and revisits the others in the reverse order.

This means that the plastic is added to the hottest island first and the coldest last. When an island is small it can mean that the layer below is still molten when the next layer is added. I simply reverse the order of every second layer so that the islands are visited in a round robin order. That means they all get the same time to cool down before the next layer is added.

The only downside is one extra long head move each layer from the last to the first island. If your machine leaves strings that is not ideal but mine hasn't since I started reversing the extruder. That also makes the Comb and Tower modules of Skeinforge redundant.

Sunday 26 December 2010

Crackers

My wife has assembled her own Christmas crackers from kits in recent years. She puts in much better gifts than even the more expensive commercial ones contain. It did backfire one year when she put a handkerchief in one and it ended up with a powder burn from the explosive!

This year she asked me to make some reprapped boxes instead to contain the usual cracker contents and look decorative on the table. The explosive element to be provided by a party popper. This is what I came up with: -


Having zero artistic ability myself: the star is Christmas star by andrewar from Thingiverse and the tree was grafted from the frame vertex of the Holiday Prusa Mendel by kliment.


My contribution to the design is the box. The base dimensions were determined by the hats my wife wanted to use and the height by the party popper diameter. This one also contains a magnetic bookmark, two chocolates, two PLA snowflakes and a charade instead of the usual bad joke or motto.


The lids had to be printed hollow side down because of the raised design on top. The gap is too big to be spanned without a lot of droop, so I used the support facility in Skienforge. I set the "support gap over extrusion perimeter ratio" to 10 to make it easier to remove and waste a little less plastic. I have no idea why the ends of the support are all in slightly different places.


It was still quite tedious to remove, so I tried Adrian Bowyer's technique of using oil to reduce the bonding. I knew the roof of the lid started at 8mm, and my host software prints the height of the current layer, so I just waited until it had finished the support and painted it with machine oil using small paint brush, while dodging the head. It worked very well and made the support easy to remove.

Here you can see the scars left behind, probably where I missed with the oil: -


I removed the scars by waving a hot air gun over the plastic.


The unsupported area sags a little and that makes a visible pattern on the top as there are only three solid layers. I think that actually makes it look more decorative by adding a textured border: -


The removed supports could be glued together and used as streamers.


These cracker replacements went down very well with both our families. They make a lot less mess on the dinner table and could also be reusable, but they all asked to keep the boxes, which was of course our original intention.

The files are available here.

Merry Christmas!

Saturday 18 December 2010

101 Mendels

From March up until a week ago I have run my Mendel as close to 24/7 as I can and it has printed 101 Mendels, with a bit of help from HydraRaptor. During all that time I have been able to sell them as fast as I could print them but there has been a dip in demand running up to Christmas, so I stopped printing on Monday, having built up a small stock.

I have shipped parts to England, Scotland, Isle of Man, Ireland, Sweden, Denmark, Belgium, Netherlands, Germany, Austria, Poland, France, Spain, Portugal, Italy, Tenerife, USA, Canada, Australia and Singapore.


It seems weird now to have a quiet house and not have to stay up until midnight every night to start the overnight build. It does mean that I have time to blog again though, and print things that are not Mendel parts.

I have been printing parts of a Milestag laser tag gun for a friend of mine. I recommended CoCreate to him and he has taken it and run with it. His first design is way more sophisticated that anything I have managed so far. It is a large device broken up into parts that just fit on my 200mm bed. Here is one of them: -


You can see the rest in Tony's blog http://funwithelectrons.blogspot.com/2010/12/milestag.html.

I think a machine printing 101 copies of itself must be a bit of a milestone in the RepRap project. That is about 100kg of plastic and not far off 4800 hours of printing in about 6000 available. It is testimony to the reliability of the mechanical design and if anything, the quality of the parts is getting better as I tweak the settings.

Thursday 16 December 2010

Crème brûlée

This is what happened when the thermocouple fell off my heated bed: -


It happened while both myself and my wife were at work so the machine finished the build. When I came home the room stank of fumes.

The bed temperature will have been limited to about 170°C by the thermal cut out I have in series with the heater for safety. Since it was making a bed of six and it went wrong about 1/3 of the way through the build, they will have been cooking for about 4 hours.


Unsurprisingly the bottom of the object shrank and went brown. What was surprising was that the bottom layer became transparent and glass like. So glass like that I cut my finger on it. The meniscus edge was razor sharp. It seems to have softened over time though, this happened a few weeks ago.

Perhaps it might be a useful process if you want a transparent window on the base of an object. You could lay down a single layer and then cook it for a few hours at 170°C and then deposit the rest of the object on top of it.


Saturday 13 November 2010

Monthly maintenance

So, after just over a month more of continuous use of my Mendel, I noticed the filament not spanning gaps well. It had also gone curly again. I measured it at about 0.6mm extruded into fresh air, so decided it was time to bore out the nozzle again. I do this with a 0.5mm bit held between my fingers with the nozzle hot. This restored the diameter to over 0.7mm again, so it is able to extrude 0.6mm filament with enough stretch to span gaps. Looks like this needs to be once a month maintenance.

Another failure I had was two of the bed support lugs sheared off the 360 y-bearings: -


These are under more load on my machine because I have a heavy metal bed. They also get some strain when parts are being removed from it. Rather than strip the machine down and replace the y-bearings, I made a new part that sits between the two y-bearings and supports the bed on three rather than four points.


If the bed is slightly flexible, for example when made from Dibond, then all four corners can be levelled independently. When it is stiffer, for example 6mm aluminium, then you can only adjust three points independently. In fact, one of those can be fixed and then there are only two points that need adjusting.

I made this using the support material option of Skienforge for the first time. To use it I have to enable the raft module but then disable the raft by setting the base layers and interface layers to zero. Without the cross hatch option the support material is easier to remove, but it tends to come away from the bed. For raft-less support the first layer of the support could do with being solid.


Other persistent problems I have are connectors losing contact, so reseating them once a month is good idea. The constant vibration and heat cycling seems to make connectors unreliable. Screw terminals with ferrules over the wire end seems to be the way to go.

The M8 nuts on the frame shake loose, I wish I had used lock washers! Also the grub screw in the pulleys eventually work loose after months and the one in the extruder drive gear needs tightening after a few weeks. It seems to be impossible to keep anything tight in plastic, especially when it is oscillating backwards and forwards. The plastic gives a little and that movement causes screws to work loose. Perhaps some thread-lock in the set screws would do the trick, but I am not certain that the screw might need to be tightened to take up slack caused by the plastic creeping.

Of course running a machine 24/7 is not what most users will do, so it will take many months of normal use before these types of fault manifest.

Tuesday 28 September 2010

Rebore

My Mendel has been very reliable and consistent running virtually 24/7, but about a week ago, after putting on a new reel of plastic things started to go wrong. The initial symptoms were that small parts built fine, in fact I printed a mini Mendel or Huxley that came out well: -


It took just two full Mendel beds, plus a few parts on HydraRaptor. I did the gears on Hydra for accuracy and the Bowden clamps at 100% fill because they look weak to me for the job they are intended to do. The plastic weighs 335g (including a Wade's extruder), slightly more than 1/3 of a Mendel by weight but the print time is about 1/2, because small parts need finer filament. I printed most of these at 0.5mm whereas I do a lot of Mendel at 0.6mm.

But getting back to the problem, the quality of large parts had started to fall off a bit. They were coming out with blobs on the outside formed by the nozzle oozing as it moves from one object to another. These were not well bonded, so they could be simply scraped off with a fingernail, but something I had tuned out ages ago. Another change was that it was not doing 45 degree overhangs well, so it left filament hanging down in the tops of tear shaped holes. Again, not a big problem as they just get drilled out anyway.

I started to suspect the temperature was too high so I pushed the thermistor well into the heater block. Then the filament started jamming after the first layer (which I do very slowly). After a few attempts the extruder drive gear broke where the captive nut for the grub screw is. This seemed more like the temperature was too low, so I suspected the thermistor was no longer reliable. I decided to rebuild the heater assembly as my last one was put together in a hurry from parts left over from an experiment. It had been in the wars as well, being entombed in ABS and hacked out again, not to mention running almost continuously for about 2500 hours. Originally the thermistor was glued in with RTV silicone, but that was long gone and it relied on the wires holding it in place.

Since my original heater hack using a vitreous enamel resistor I had moved on to a smaller resistor on Hydra and found that worked better. The surface area of the block is a lot less and that is where most of the heat is lost from, so the amount of power required goes down. It also warms up faster of course, both due to less heat being lost and also less thermal mass. The resistor I have settled on is a Vishay / Sfernice RWM04106R80JR15E1


The thermistor is drilled as close as I dare to the thread for the nozzle and then counter-bored so that the entrance is wide enough for the PTFE sleeving. The wires have PTFE insulation to withstand the temperature and the resistor is soldered with 300°C HMP solder. I think I could also get away with ordinary unleaded solder as well because of the length of the resistor leads, but I didn't want to chance it.

After a tip from Giles I used Rothenberger high temperature glass rope adhesive to glue the resistor and the thermistor. It sets in only half an hour, which is a big advantage over other things I have tried. I also used it to stick ceramic tape on the outside of the block to insulate it.

When I first heated it up the adhesive bubbled causing a downward slope in the temperature graph. I thought at first the thermistor had been dislodged by the blistering, but I think it was just temporarily cooled by the out-gassing. I should have heated it much more slowly the first time I think.

The new heater works much better than the old one. The warm up time to 255°C is about 280 seconds, whereas the old one took about 400 seconds (the bed takes about 350 seconds to get to 140°C). It also runs at about 70% to maintain 240°C while extruding, whereas the old one needed about 90%. The bang-bang control cycles much faster and only deviates by one degree. That is because of the close proximity of the thermistor to the heater. Because it is mounted between the heater and the barrel I can be sure the swing at the barrel is even less. I calibrate against a thermocouple inside the barrel, so any temperature difference across the block is calibrated out. It should be negligible though because the thermistor is also very close to the barrel and aluminium is a very good conductor. The extra power needed to heat the ABS when extruding 0.6mm filament at 32mm/s is about 10%, i.e. ~2W.

The new improved heater didn't solve any of my problems though. While reassembling the extruder I tried pushing filament through by hand. It was much harder than I remembered it was when I first built the extruder. At this point I was beginning to suspect the plastic was different in some way although it looked identical and was part of the same purchase.

I noted that the filament was coming out very curly. That was something I had noticed happening on both my machines when I do a test extrusion, but I had ignored it. I measured the diameter though and found whereas it normally swells to 0.7mm this was coming out oval and about 0.5mm by 0.6mm. It all fell into place then. I have read that the difference between straight hair and curly hair is whether it is round or oval. The only way the filament could be oval is if the nozzle aperture is no longer round. I put a 0.5mm drill bit through it and it started to extrude round, straight, 0.7mm filament again. The hole must have been partially occluded by the burnt plastic that tends to glaze the end of the nozzle. That caused the plastic to come out thinner and faster. It was fine when making objects with 0.5mm filament because it was still being stretched but when building with 0.6mm filament it was being compressed, so would hang loose if given the chance. The smaller hole increased the barrel pressure, which is why it oozed. The plastic would be compressed more, so require more backing up to release the pressure and stop the flow. Also the extra pressure was too much for the pinch wheel when extruding at the top flow rate I use, which is 0.6mm at 32mm/s. I think the M8 hobbed bolt is below the ideal diameter for softer plastic like ABS.

I also re-bored HydraRaptor (with a 0.4mm drill) and that stopped the filament being curly as well. It seems nozzles need occasionally re-boring. I had assumed that the hot flow of high pressure plastic would have kept the hole clean, but not so.

So a simple fault had my machine out of action for days because I didn't recognise what the symptoms meant collectively.

Sunday 12 September 2010

Some corners like it hot

Large objects with sharp corners, such as the Mendel z-leadscrew-base, produce enough stress to form a blister in the PET tape on my heated bed. These can only be flattened again by pricking the tape. I can't understand how air gets in and cannot get out again, but that is what seems to happen.

The blisters leave a small indentation in the object's base. It is only an aesthetic problem because the base remains flat, i.e. it doesn't rock on a flat surface.

Sometimes the blister allows the corner to peel from the bed towards the end of a build, allowing the corner to curl upwards a little. Generally I can avoid that by cleaning the bed with acetone before problem builds. I also use hexagonal infill on those parts and only two solid layers rather than three in an attempt to reduce the stress. When I design my own parts I round the corners, where possible, to prevent such problems.

A solution may be to use a sheet of PET rather than PET tape, but then you need to find a way of holding it down. One thing I have noticed though is that when I build a bed with four of the z-brackets closely packed the corners on the inside don't blister or lift. That must be because the air around them is hotter. As an experiment I added some little plastic walls to the build to act as baffles to keep the heat in as the bed moves through cooler air.


These have a 5mm thick base to help keep the tape flat and are 1mm away from the edge of the object. They work well and stop the blisters forming at the corners. They are very similar to Forrest's apron technique but their primary function is thermal rather than mechanical. A more general technique would be to build a thin wall all the way around the perimeter of the objects to cocoon them. I expect that would only need to be one filament thick and perhaps might give a similar effect to having a heated build chamber.

Tuesday 24 August 2010

Freezing your bits off

Since I started cleaning my PET tape with acetone it can be hard to remove the parts from it sometimes. Somebody suggested trying freezer spray a while back, so I gave it a go.

I got this Arctic Spray, which is intended for freezing water pipes so that you can work on them without draining the water. I must admit I wouldn't fancy having a strict time limit if I was plumbing, you would have to be sure you had all the right tools and materials to start with. My occasional forays into plumbing rarely go to plan and usually involve a trip to B & Q in the middle.


I tried it first on an ABS part before the bed had cooled for any length of time, so it would be at about 100°C and the parts still soft. The part curled up at the edges and so came off easily. I thought I had ruined it by making it warp, but to my surprise it became flat again when it cooled. Still that seems a bit risky, and the spray isn't cheap, so now I cool the bed to 50°C with a fan and then spray any stubborn parts that I can't pull off. It works a treat but I don't know how long a can will last. It would have to be a lot of uses to make it worth the cost: £4.49 plus £2.20 on eBay. Hitting them with a block of wood and a hammer is a lot cheaper!