Friday 18 July 2008

Deviant Z axis

The RepRap Darwin Z-axis has four screw thread drives linked by a timing belt and toothed pulleys, driven by a large stepper motor.


There are a few things about the design that I am not keen on: -
  • The beefy motor and timing belt make it expensive.
  • The belt tension puts lateral force on the threaded rod, which causes a lot of friction and looks like it will cause the plastic bearings to wear.
  • Making the pulleys and splicing the belt seem like tricky things to get right.
When Forrest Higgs came across a small fast stepper motor I decided try an alternative scheme using four motors wired in parallel, eliminating the pulleys, belt and lateral forces. The four small motors are about the same price as the big one, so the cost of the timing belt is saved.


When the motors arrived I got a bit of shock at how small they were. Although I had seen photos from Forrest's blog they were about half the size I had imagined. They are lowish inductance and large step angle (15°) so they can go very fast.

I designed a bracket to hold the motor and mate up with the Darwin corner bracket: -


As you can see there is vast discrepancy between the shaft sizes and one quarter of the weight of the table is born by each of the tiny motor bearings. I was staring to get a bad feeling about the idea.

I had several unsuccessful attempts at making a flexible shaft coupling from ABS: -


None of these were flexible enough or concentric enough. My final design used a piece of plastic piping to get the flexibility.


It has a captive nut for the M3 set screw. The piping is just a friction fit and the rod screws into it.

Even with this design I had a problem with the eccentricity of the hole for the motor shaft.
When you make a hole with fused filament fabrication, the outline of the hole has a start and an end. This causes a bump in the perimeter. Possibly, the outline should end one filament diameter short of where it started, rather than being a full circle. Also each layer should start and end in a different place. When I get chance I will try this.

To remove the bump I ran a drill though the hole. When the hole is as small as this (2mm) the bump displaces the drill leaving the resulting hole off centre. I ended up having to drill them on the lathe, which is cheating.

I mounted the four motors and wired them up in parallel to a micro-stepping chopper drive and a 36V power supply.


I don't like the RepRap scheme of distributing the electronics around the machine so I mounted mine all together at the bottom of the machine on a sheet of perspex. The perspex rests on one of the base diagonals and is held in place by four brackets which clamp around the lower frame.


As soon as I powered it up I realised that the motors had nowhere near enough torque to turn the M8 threaded rods. It wasn't a big surprise, two things that were though:

The motors got ridiculously hot, well over 100°C before I switched them off. The coil resistance is 27Ω which is smaller than some much larger 12V motors, giving a dissipation of about 10W. These look more like 5V motors to me, either that or they are not continuously rated.

I found that my micro-stepping drives don't work well with tin can motors. The micro-steps are very uneven in size. Micro-stepping assumes that the torque displacement curve of the motor is sinusoidal, which doesn't seem to be the case for large step angle tin can motors. Not a big problem in this case as I don't need the extra resolution. I will replace the drive with something simpler when I have got the machine working.

So all in all a big failed experiment! I should have wired up one of the motors before I wasted the plastic making all the mounts.

My fall back plan was to use some larger tin can motors I rescued from a skip recently.


The one on the left is bipolar and the one on the right is unipolar. I decided to try the bipolar ones first, I may switch to the unipolar to simplify the electronics, if they have enough torque.

The shaft coupling was much easier to make because the shaft is bigger (4mm) and has a pin through it. I didn't need to resort to the lathe this time.


I designed and made a new set of motor brackets, they took about 8 hours to print in total.


Here is one motor installed: -


It seems to have plenty of torque for the job. I am waiting for more bolts to arrive to mount the others.

These are not low inductance motors so they won't be as fast as the original single motor design. The large step angle (7.5°) and my 36V supply will help to mitigate this. I originally thought the z-axis speed was unimportant because it moves so rarely, but actually on HydraRaptor I use the z-axis to lift the head 0.4mm when moving between filament runs so it does need to be reasonably quick.

This scheme certainly simplifies the mechanical construction but may not make economic sense. The motors are cheap in large volume (£2-3) but I haven't found a retail price.

Sunday 29 June 2008

Bespoke bracketry

A friend of mine makes underwater cameras from plumbing accessories so that he can observe the fish in his pond. He needed a bracket to hold a piece of pipe with an adjustable tilt angle so he asked me to make one. Here it is: -


I don't know how long ABS will last in a pond, but as long as it is years rather than months it is no trouble to print it again.

Saturday 28 June 2008

From illusion to creation

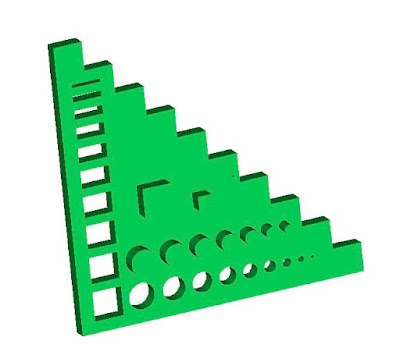
A few days ago I spent a frustrating evening trying to create this test shape in ArtOfIllusion: -

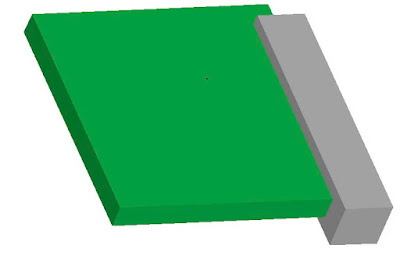
No matter what I did, I could not get a manifold object that could be exported as an STL file. Eventually I reduced the problem to the fact that AOI cannot do a simple boolean subtraction of two rectangular cubes correctly.


The result looks OK but it is non manifold, I think some of the triangles are the wrong way round.


Fixing
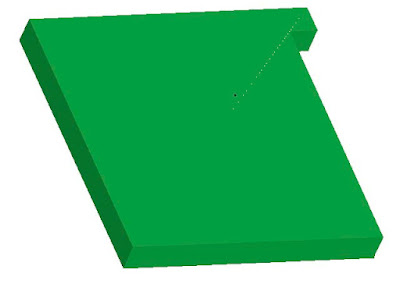
it with the Solid Editor produces this: -

So AOI is not really usable for engineering. It is open source, so theoretically I could fix it myself, but life is too short to fix my own bugs, let alone other peoples. I posted a bug report and moved on.

Speaking to one of my colleagues who does mechanical design for a living, it would seem that professional tools are much easier to use and you don't have to worry about operations on coincident faces, etc. He recommended CoCreate Modeling Personal Edition, which is free for non professional use. It is limited to 60 parts in one design and can only save designs in its own proprietary format, but it can export STL and VRML. It is Windows only and needs an internet connection every three days. It is however, very easy to use. I had a quick look at Google Sketchup and Blender but they did not seem as easy.

The way you model in CoCreate is that you start by drawing in 2D on Workplanes. Workplanes can be arbitrary, but generally are created on a face of the part you are building. The 2D drawing tool is called CoPilot. It shows lots of hints when lines are parallel or line up with things already drawn, and shows dimensions to nearby features. This makes it very easy to create 2D geometry with precise dimensions, or geometrical alignments. You can also draw construction lines to help you line things up.

When you have a 2D profile on a Workplane you can then Extrude it or Turn it to make a solid. This is similar to AOI, except that the 2D drawing in AOI is very primitive and it is hard to get exact dimensions. As well as adding material you can remove it with familiar machine operations like Mill, Bore, Punch, Stamp, Section and Shell. These would all take multiple steps in AOI. CoCreate also has the boolean operations: Unite, Intersect and Subtract, but whereas you have to do almost everything in AOI with booleans, I have not needed to use them so far in CoCreate.

Once you have your basic 3D form it is very easy to add chamfers, fillets, blends, etc, and surprisingly it is also easy to remove them again.

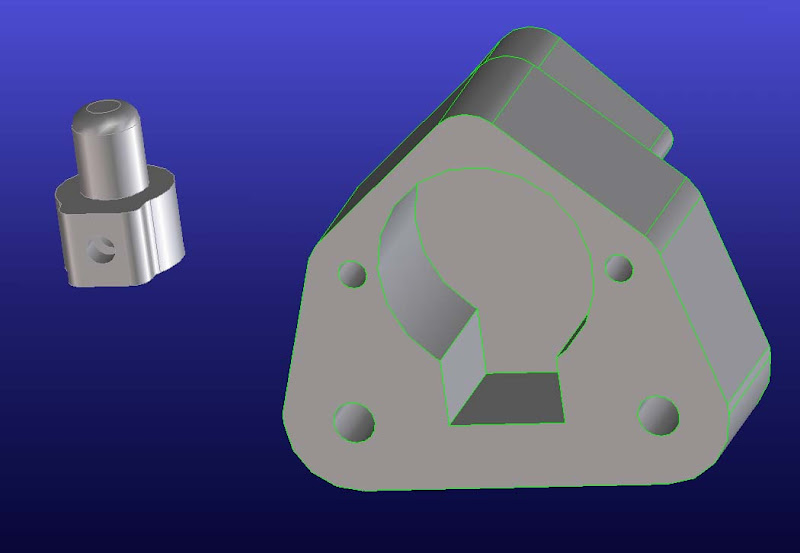
Nothing I have done so far, (including filling a hole with a cylinder of the same dimensions), has managed to create a non manifold shape. It is very quick and easy to make practical objects. Here are a couple of parts I modeled for my experimental z-axis as they appear on screen: -


I have no idea how I could have created these in AOI.

Thursday 26 June 2008

Spanning a void

s0lstice requested that the next time HydraRaptor was extruding into fresh air I should post a video, so here is a video of a part with a large covered void being made: -


Spanning a void from Nop Head on Vimeo.

It is a bracket to mount a tiny stepper onto a Darwin corner bracket.


As you can see, the unsupported layer is very untidy, but the next layer sorts itself out. The reason I had to make this side the top is that there are projections on the bottom to mate with the corner bracket: -


Here is what it looks like installed. I need to sort out a shaft coupling. I have no idea if the motors will be powerful enough though.


I also made some feet for my Darwin to stop it scratching the table: -


I stuck felt pads, that I happened to have, on them, but rubber would probably be better for non slip.

Monday 23 June 2008

Alternative alignment

The Darwin build instructions recommend squaring up the frames by adjusting the corner blocks to get the correct length stubs sticking, out as the excerpt below shows: -

20.JPG

This assumes that the rods are exactly the same length. I think what is actually important is that the gap between the rods is exactly 400mm. To achieve that I made a temporary jig from a couple of diagonal tie brackets and a piece of the 8mm rod and adjusted it so that the outside of the brackets was 400mm. I then used that to space all the rods of the lower frame. I also set the short stubs to 20mm using the first method above. Any variation in rod length then ends up on the the 28mm stub.

Thursday 19 June 2008

Knobs

I wanted some wingnuts to let me quickly clamp the bed material to the table and release it again. The XY table came from the US so it has 2BA, rather than metric threads, in it. That means I can't get them locally and would have to order them. The cost would be about $6 for 10 including postage, but I only wanted 4.

Then I remembered I have a machine than can make things so I made some knobs with captive nuts: -


Easy to design, but the hexagonal cavity is a pain to model in ArtOfIllusion. You have to start with a six sided polygon. You then convert it to a triangle mesh and then extrude it to make a hexagonal prism to subtract from the cylindrical shaft.

The three types of solid primitive: cube, cylinder and sphere all have editable dimensions but for some reason polygon primitives don't show any dimensions. To get round this you have to set the grid spacing to the dimensions you want and snap the polygon's bounding box to the grid.


I intended the nuts to be a push fit but they were too tight so I pushed them in with a hot soldering iron. The small M4 one on the left was a test to see if the design scales. I think the nut cavity needs to be a bit shorter for metric nuts.

These cost less than 6 cents each in plastic so that saved me $5.76. A good example of the economics of RepRap. Although it is no doubt cheaper to make wingnuts by traditional means in large numbers, the cheapest way for an individual to obtain them in small quantities is to RepRap them. Of course I needed some plain nuts, but they are a lot cheaper and easier to obtain.

Saturday 14 June 2008

Unsupported!

Kyle Corbitt has designed a RepRapable solar collector described here.


The structure is made up from a triangular lattice like this : -


The risers only overhang 30°C, so they are no problem but the horizontal beam looks like it should need support material. Kyle asked me to try building it without, so I gave it a go. Here is what it looked like after it was made: -


Very hairy but basically sound. This is it after being cleaned up with a scalpel: -


It took about 45 minutes to make and used only 7g of ABS, not including the raft. Head travel while not extruding was about 42% of the filament length but as I move twice as fast as I extrude that was only 21% of the time.

Despite the risers only being about 3.7mm thick it is very strong and rigid. I loaded the centre of the beam to 1.5Kg and it showed no sign of breaking. I also loaded one end to 6Kg with no sign of movement, so the beam could easily support 10Kg and possibly a lot more.

At the top of the base beams the triangular section goes down to zero width. The top four layers are only one filament wide so are very fragile. I don't think they add much to the strength so it would be better to truncate the top of the triangle. Interesting though because it is the first time I tried to make something this thin (0.6mm) in ABS.

Enrique added an option to make the infill go along the length of bridges but it is not actually needed for this shape. The top beam has an inverted triangular section so the first layer of it is just two parallel outlines which span the gap. The rest of the beam builds out from this at 30° so it does not matter which way the infill goes. The first few layers did sag a bit but the top of the beam is flat. An inter layer pause may have reduced the sagging.

So this looks like a good way to make large structures that are light and quick to build, but still strong.

Friday 13 June 2008

Support, who needs it?

I think the original Darwin design assumed it would have a support material extruder, so some of its parts require support material to be made. I.e. they have overhangs that are more than 45°. Vik Olliver and Steve DeGroof subsequently modified the parts requiring support material so that they can be made without it. That allowed Vik to replicate his Darwin without a support extruder. STL files for the modified parts can be found here.

At the time I was making the Y-motor-bracket for my Darwin, the modified file was missing, so I decided to see what would happen if I tried to make the unmodified version. I expected the result to be a mess.

Here is the original file, it has a recess in the bottom to fit the shape of the motor and stud coming out of the side at right angles: -


Here is the modified version to reduce overhangs to 45°: -


The problem with this is that it doesn't fit the motor properly. I think Vik was using a different motor.

To my surprise the original version came out fully functional. It is a bit messy, some of the outline was extruded into mid air and had to be cut off, but the infill managed to build out and recover the correct shape after a couple of layers.


It makes me think we might be able to build out into fresh air simply by going slowly and with a fan to cool the filament.

I built the modified version of the X-motor-bracket, but that has no recess as well so the motor did not fit it. To fix that I made a washer to replace the recess. This was simply a slice off the Y-motor-bracket: -


It is 1.6mm thick, which is four layers with my preferred settings. It seems to do the job. I had to use 20mm bolts rather than 15mm to mount the motor. The pulley is normally mounted 2mm from the end of the shaft so moving to 0.4mm from the end should compensate for the washer.


It should also be possible to use this washer on the other motor brackets. I uploaded it to the wiki page.

Sunday 1 June 2008

Catalogue of disasters

Last week things were going well. I made this door handle to be exhibited at the Cheltenham Science Festival: -


More details here.

I wrote a script that can print n copies of the same object by spacing them out so that the head can get between them. It would be more efficient to print them closer together, one layer of each at a time, but if anything goes wrong then they are all scrap so I am taking the conservative approach at the moment.

With the script I managed three printing shifts in a day. I set off a batch of seven diagonal tie brackets in the morning and they were waiting for me when I got home from work.


I then printed the X-carriage during the evening and another seven diagonal tie brackets during the night.


My wife thinks it looks like a ruined church and I have to agree.

After that things started to go downhill. The flexible drive coupling broke for the third time, but that was easy to replace by soldering in another piece of cable.


The first thing I made when it was back up and running was an old version of the extruder motor bracket which allows a direct drive. At this point the JB-Weld heater insulation started to fall off leaving the heater wire bare. It seemed to miraculously stay in place and still give heat even when most of the JB-Weld had gone.

I did notice the heater duty cycle was going up, eventually reaching 100%, but that was to be expected as there was less thermal conduction from the wire to the barrel. Then the temperature didn't quite make the set point, but it was close so I carried on using the machine. I made three pulleys but they seemed to get too hot. The top was distorted and they were impossible to separate from the raft. I put this down to them being smaller than anything I had made so far and decided to make something bigger. I left the machine making a bed corner bracket and went out for a walk. When I can back the house stank of burning plastic and the bed corner bracket was impossible to separate from its raft, and the raft was welded onto the bed material.


I finally twigged, the reason the temperature was reading low, and hence the heater was full on, was because the JB-Weld holding the thermistor had also decomposed. I don't know what the temperature was but it was way too high.

So I switched to my Cerastil heater and the nozzle from my high temperature extruder experiment. I also had to replace the bed material as it had a big hole in it where I broke off the corner bracket.

I powered it up and calibrated it and it seemed fine. I left it running for a while and it started making popping sounds and producing little clouds of smoke. Very odd, while I was puzzling over it the temperature reading started falling with the heater on. Then clouds of smoke started streaming out of the extruder.

Aha I thought, the thermistor must have come off again, but when I stripped it down I found it hadn't. What actually happened was molten ABS had escaped from the thread of the nozzle and got onto the thermistor. For some reason that must have cooled it, causing it to read low, so the heater overheated again.

I fixed the leak by sealing the thread with PTFE plumbing tape. I set the machine off again but it only got half way through a raft when the heater barrel escaped from the PTFE insulator and the nozzle buried itself into the brand new bed material.

I made a new PTFE barrel (as the old one had obviously been softened by its high temperature excursions) but when I was reassembling it, the thermistor, which was only stuck with JB-Weld, fell off. So back to square one!

I stuck the thermistor back on with Cerastil but when I screwed the nozzle on it was too close, so it broke off again. Starting to get a bit frustrated now, to put it mildly!

I stuck the thermistor on again with Cerastil, this time after I screwed the nozzle on, but while reassembling the extruder for the nth time one of the heater wires broke off. I was able to dig out the connection and solder to it with high temperature solder.

I reassembled the extruder yet again and set the machine going. Half way through the raft the drive shaft broke, not the flexible bit, but the solid bit it was soldered into!

At this point I started to think I was never going to get a working extruder again. A week had passed, I had been working on it every evening but every time I fixed something, something else broke. I had taken it apart and reassembled it so many times that the threads on the M3 studding that tensions the springs had worn away and had to be replaced.

Rather than make a new drive shaft I decided to go for the direct drive design that is slightly shorter. I soldered a nut to the end of the broken shaft and modified the couping in the lathe to shorten it and give it a taper to clear the filament.


So HydraRaptor gets its first RP part.


I now seem to be back up and running and have managed to knock out several more Darwin parts.

Pulleys and belt clamps: -


The belt clamps are the smallest things I have made, they only take about 4 minutes each.

This is the largest thing I have made, I think it is the biggest Darwin part, the X-motor bracket: -


It takes about 4 hours and uses 37cc of plastic when done with 25% fill. That is just less than $1 worth of ABS at the RRRF price of $20/Kg.

I also made four bed corner brackets: -


I can only fit two at a time on the table: -


I found that the mystery bed material I am using has a glass transition below 100C so I think it is PVC plus a filler. I stick it down with double sided tape but larger objects manage to lift it at the edges so I made a frame to hold it down. It is a sheet of 3mm HDPE laminated with aluminium. I milled the aperture in it using HydraRaptor's milling head. The only problem is it restricts the build area slightly because the biggest milling bit I have is smaller than the nozzle.

So it seems the machine is running reliably again and two of the things that persistently fail, flexible drive cable and J-B Weld have been eliminated.

I also made this coat hook for Adrian Bowyer: -


It is Adrian's design, sliced by Enrique's software, extruded though a nozzle made by Adrian. It took about 40 minutes and used about 8g of ABS costing $0.16.

Tuesday 20 May 2008

Mystery material

The bed material I am using for ABS works very well but the problem is I don't know what it is. My wife bought it for 10p when I was trying lots of things for HDPE and was disappointed when it did not work. She is now delighted I found a use for it as she loves to get a bargain.

It originally looked like this :-


It is about 3mm thick. Most of that is the plastic backing. On the front is printed paper, stuck on with a double sided sticky film and covered with single sided sticky film. This can be peeled off to just leave the back material so both sides of that can be used.

Here is a bit I destroyed developing rafts: -


It will bend a little but then it snaps, as you can see, when I pulled a raft off that was stuck too well.

I normally use this flowchart to identify plastic but it fails with this material because I think it is a polymer with a fibrous filler, possibly paper.
  • It melts with a low temp soldering iron so is not a thermoset.
  • It floats very well but it is not PE or PP, so that is probably due to a filler.
  • It does not burn well and is self extinguishing.
  • It gives black smoke and if anything has a yellow flame.
  • It does not drip.
  • The smoke has some odour but I don't recognise it. I don't know what phenol smells like though.
So perhaps it is PPO and a fiber. If anybody knows where I can buy it from I will be very grateful. It is quite reusable but I expect it will need replacing sometime and other people want to use it.

Monday 19 May 2008

Stepping up production

As HydraRaptor seems to be working so well with ABS I decided to put my high temperature extruder design on hold and go for making a set of Darwin parts in ABS. This is how far I got before my extruder wore out again: -


The flexible drive cable disintegrated and most of the JB-Weld has fallen off.

Using Enrique's Skeinforge slicer I can make very sparse objects that are still strong when made in ABS. I set the infill to 25% but I am not sure exactly how Skeinforge interprets it. The infill lines are not parallel so they get further apart the longer they are. Large voids are very sparse indeed and smaller voids look like 25% fill.


The outer wall is always two filaments thick, one is the perimeter and the other is the ends of all the infill zigzags that meet each other. With 0.5mm filament and a layer height of 0.4mm the filament threads are 0.6mm wide so the side walls are 1.2mm thick. I set the number of solid layers to 3 so the top and bottom are also 1.2mm thick. Skeinforge is clever enough to make layers with some areas 100% fill (where they are less than three layers from the top or bottom or internal surface) and other areas sparse. Very clever stuff, which really speeds up the build process but still gives remarkably rigid and strong objects.

I made four of Darwin's eight corner blocks (taking about 2.5 hours each) but I was unhappy with the amount of warping I got when not using a raft. I decided to develop peelable rafts and reusable bed material, like commercial machines have, before making any more parts. That took a lot of experiments to get right but I now have a workable system for ABS.


The bed material is the advertising board I used for ABS before, but this time I am using the back. Unfortunately I don't know what it is. It is very buoyant in water and self extinguishing if I burn it. ABS bonds to it very well. If I extrude the object directly onto it then it is impossible to remove. If I put down a sparse raft first at a low temperature I can remove the raft with a penknife. It blisters the surface but that does not seem to matter because the raft presents a smooth surface to the object. It just gets a bit harder to remove the raft each time as the surface gets more blistered.

The board is not strong enough to resist the warping on its own so I stuck it to the back of some floor laminate with Evostick contact glue. Even that could not hold the edges down, hence the metal strip.

The first raft layer I put down is a 1mm filament zigzag with a 50% spacing, extruded at 4mm/s @ 200°C with a nozzle height of 0.7mm. Because the layer is so thick and extruded quite flat, it absorbs any surface irregularities and makes the initial head height less critical. Spacing it 50% allows it to spread sideways, if the head is too low, and also allows it to be removed. 100% fill is impossible to remove and the head height becomes critical. If it is a little too low, the filament is wider but there is nowhere for it to go, so it builds up on the nozzle and blobs.

The first layer is far too course to build upon so I put two layers of fine zigzag the other way on top. These are 0.5mm filament extruded at 16mm/s with a layer height of 0.4mm and spaced just wide enough to not bond with itself laterally. That makes it easier to remove from the base of the object. The temperature is raised to 230°C to give a strong weld to the layers below.

Two layers are needed because the first layer has a rippled surface as it spans the wide gaps in the layer below. I put them down on top of each other rather than alternating the direction of the zigzag. That makes them weaker laterally therefore easier to remove from the object with a penknife.

The raft uses horizontal and vertical zigzags so there is no correspondence with the object infill which is at 45°. Again that makes it easier to separate without risk of pulling a thread out of the bottom of the object.

To ensure the raft does not bond too well to the object it is cooled for a minute with the fan. The first layer of the object is then extruded at 8mm/s @ 215°C and subsequent layers at 16mm/s @ 230°C. The temperatures are critical, so depending on thermistor site and calibration, they will vary a bit from machine to machine.

This is what the bottom of the raft looks like: -


And this is the top: -


It does slow the build and waste plastic but it reduces warping and makes the bed reusable over and over again. I expect it won't last forever but you can certainly use it many times.

The base of the object is also pretty neat and tidy: -


Here are the stats for the objects I have processed so far: -

Seconds Filament @ 16 mm/s Moves @ 32 mm/s Build time Plastic volume Quantity required Total build time Total plastic
Corner bracket @ 25% 8866 122009 mm 34926 mm 02:27:46 24.0 cc 8 19:42:08 191.7 cc
Opto bracket @ 50% 1200 15902 mm 4661 mm 00:20:00 3.1 cc 3 01:00:00 9.4 cc
Diagonal tie bracket @ 25% 2178 31236 mm 3716 mm 00:34:28 6.1 cc 20 11:29:28 122.7 cc

I will update this table as I progress to make the Darwin parts.

Tuesday 6 May 2008

Swiss cheese

HydraRaptor made a Darwin corner bracket in 50% filled ABS this evening: -


It took 2 hours 35 minutes. It feels pretty sturdy but there is some delamination through the thin section of the corner facing the camera. A bit of a weak spot in the design I think. Also the base is a bit warped as I didn't use a raft. I don't know if these matter as I haven't worked out what all the holes are for yet. I need to make seven more for a Darwin. I will probably do a 100% version for comparison.